
Launched in May this year, our Cedar panels are the first in our Outdoor range. As the company grows, we aim to provide you with the best and most simple solutions to upgrade your homes and commercial spaces. These Cedar Slatted Panels are our answer to your exterior transformations.
The modular design means they are made to fit together seamlessly with little to no effort. You can get creative by choosing whether to place them vertically or horizontally, or feel free to alternate. They are great to use as garden fencing that is much easier to install than manually creating a fence. However, there is no need to remove what is already there as these are designed to fix to old posts, walls or wooden fencing. A quick and easy way to elevate your exteriors.
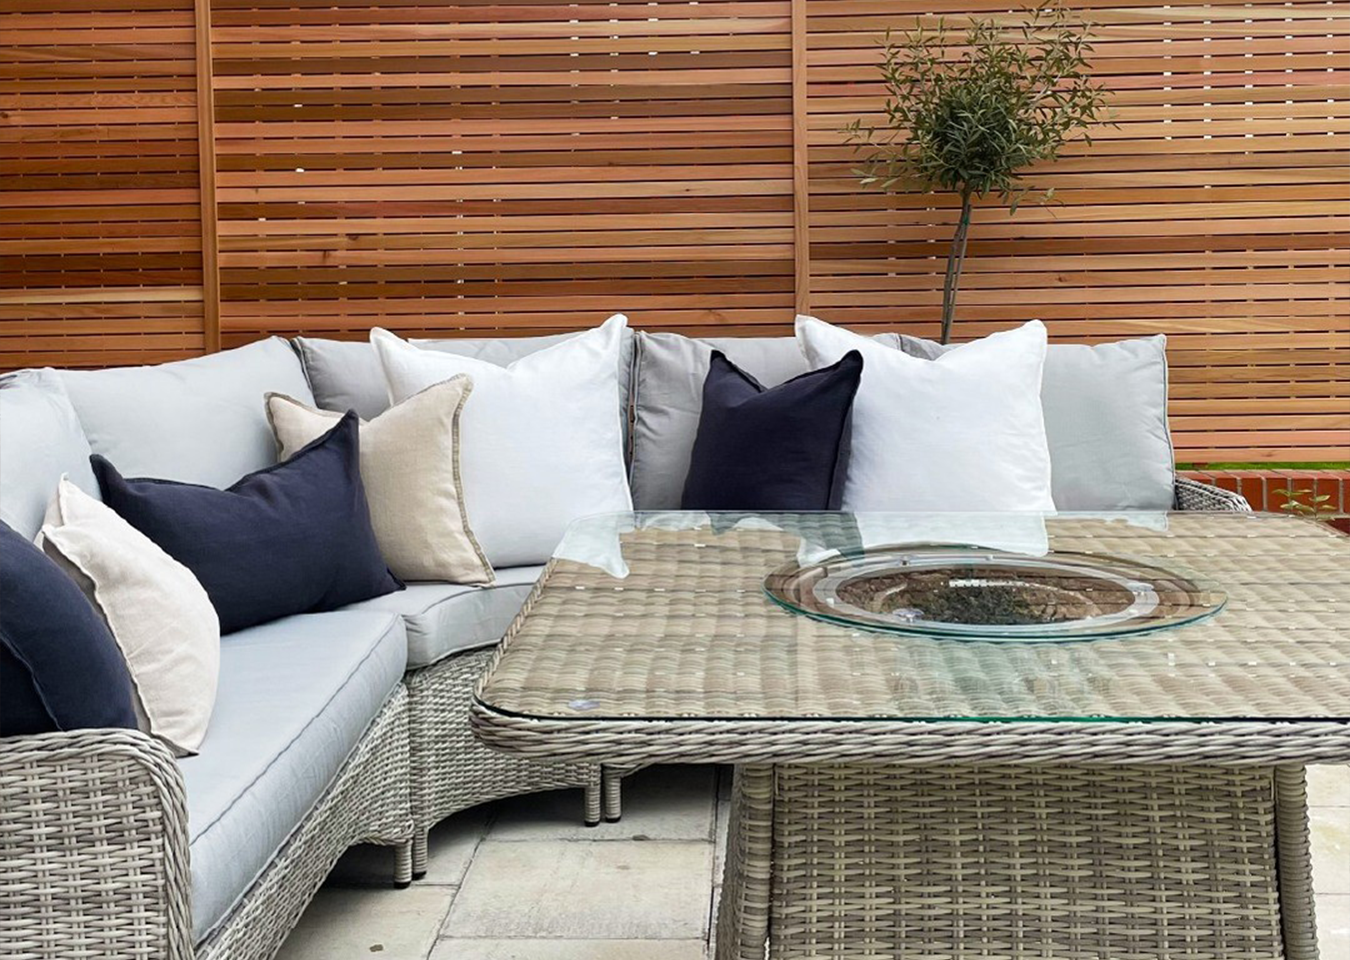
Each panel contains 12 slats, equally spaced with 6mm gaps. Made from Real Wood Canadian Cedar, they are expertly durable making them suitably weather resistant. The beautiful golden tones and natural textures are perfect for matching any garden design. Or add a personal touch with our nourishing Wood Creams in Bold Black, Gravel Grey, Misty Grey, Dirty Grey, Creamy White, or Snow White.
Manufactured in the UK, exclusively by Naturewall, you can purchase in single panels or as a modular bundle. The modular pack contains three ready-made panels that can be fixed together via the two central uprights.
Where do I start?
Measure the space you are intending to place the panels for you to decide which option is best to buy. We recommend the modular bundles for larger spaces and when using as fence panelling. Single panels are ideal for smaller areas, decorating pre-existing fencing and walls, and helping to offer sectioning.
Our customer service team are always on hand if you have any queries regarding your order. They are also on hand to help you make your initial decisions or check out our free consultation service for expert design advice.
Once you have made your purchase, the order will be with you between 2 to 4 working days. When the products arrive, check out the straightforward fitting guide, or follow this article to help you install your panels with ease.
What will I need?
Cedar panels (single or modular bundle)
8 x Screws (per panel)
Drill or Screwdriver
Spirit level
Wood saw
Tape measure
Recommendations:
- When buying your Cedar panels, remember to add some UV Protection Oil to your basket for a longer-lasting panel. Or check out the wood creams to preserve the breathable structure whilst aligning to your own colour scheme.
- Naturewall offer Tongue and Groove Stainless Steel screws in two different sizes. In each box, you receive 200 screws, alongside a T10 screwdriver bit so there is no need for a drill.
Get Prepared
Before starting, ensure you have all the correct products and lay them out in front of you ready to get to work. Clear the space you need and if you are placing your Cedar panels onto a pre-existing surface, give this a clean or brush. Make sure to wear the correct PPE for your safety (e.g. goggles, heavy-duty gloves) and be cautious when lifting. A single panel weighs 8.62kg.
Install your Cedar Slatted Panel
-
Position the first panel at the recommended position of 50mm above the ground. Choose to place it horizontally or vertically. Use a spirit level to ensure the panel is straight before screwing in place.
-
Fix the first panel using a screwdriver and 4 screws spaced evenly on each end of the panel, between the horizontal slats.
-
Position second panel next to the first panel, or above if stacking vertically, and follow the same method.
-
Repeat step 3 for as many panels you have, to cover the width or height you wish.

Image Credit: @carlyshomeideas
Naturewall Tips:
-
If you are placing onto a pre-existing surface, you may wish to drill some pilot holes for further ease. Use a pencil and measuring tape to guide where the holes should be based on where you want the panel to be placed. This will reduce the risk of splitting the wood, particularly when placing onto a brick wall. Naturewall’s screws have a single coarse thread, designed to provide a neat and tidy finish to the fixing point. Should they need to be unscrewed in the future, these screws can be removed without damaging the timber.
-
For extra stability and weather resistance, fix extra screws in the centre of the panels, as well as the ends.
Panel protection
As mentioned, you can decorate your panels with Rubio wood creams. Unlike standard paint, the cream structure is easy to apply and will preserve the timber, aiding the water-repellent capabilities of the Cedar. We recommend re-applying every 2-3 years for a long-lasting pearl effect.
Alternatively, if you prefer the natural golden Cedar tones, leave the wood to acclimatise. After 12 weeks, apply UV Protection Oil. Your panels may gain slight discolouration, depending on the weather between this time. Using the oil will bring the panels back to their natural colour. Re-applying every 2-3 years after this will ensure the durability of your panels continuously into the future.
If you have any other questions regarding Cedar panels, don’t hesitate to contact our excellent customer service team (info@naturewall.com) or visit our contact us page.