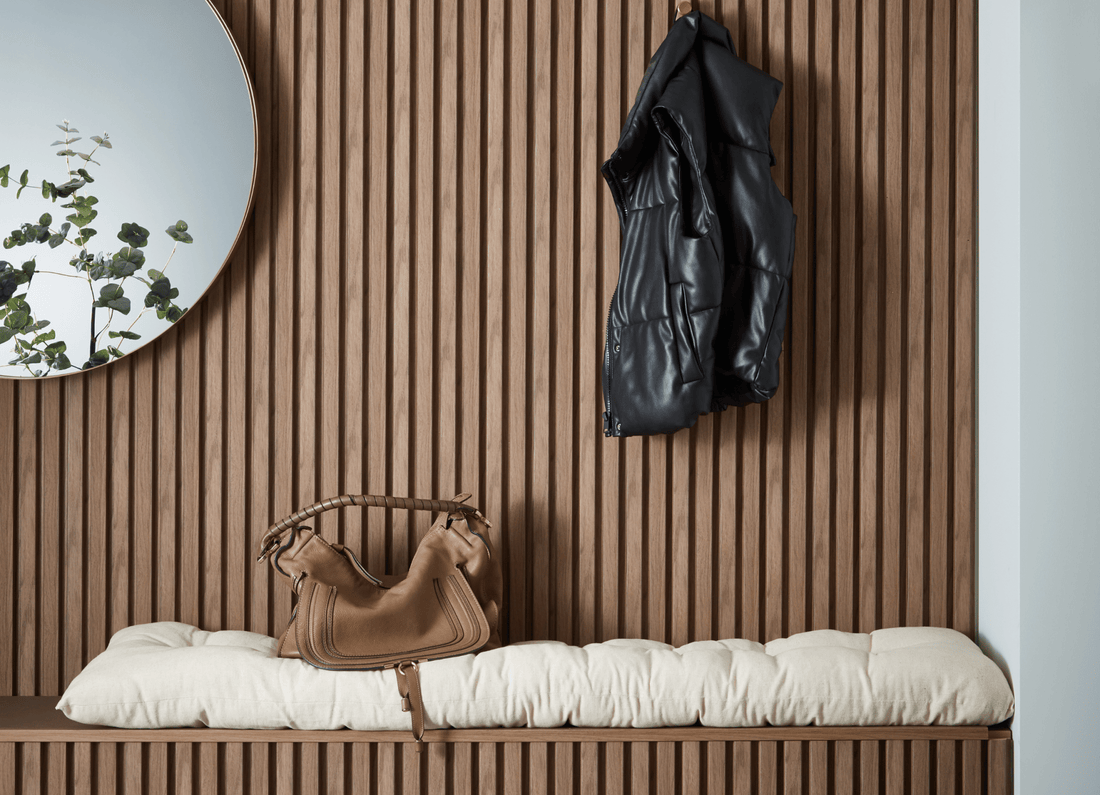
The new SlatWall Waterproof range is our latest solution for your interior upgrades. It is time to reimagine your high humidity spaces and introduce that classic and contemporary SlatWall design, now easier to maintain and long lasting with a fully waterproof finish. These new waterproof panels are ideal for transforming bathrooms, kitchens, entryways, utility rooms, boot rooms and more. You can even create your very own bespoke designs with Individual Slats for an artistic statement in your home.
Wherever you choose to use your SlatWall Waterproof panels, we are here to ensure your installation is simple and easy so you have more time to enjoy your space. Each order will come with a printed fitting guide in the box (also available as a PDF on our website) or follow our steps below for further tips and tricks ensure the installation process is smooth sailing.
Where do I start?
Make sure you have measured your desired space first before purchasing. You can use our functional coverage calculator to work out how many panels you will be needing. Our panels are sold in packs of 3 which slot together seamlessly with the modular tongue and groove design.
Be sure to add your accessories to your cart as well so you can complete the look using an end cap or top trim. Each panel has an exposed fitting edge which can be covered up with an end cap for a fully symmetrical and effortless finish.
If you are wanting some further guidance, feel free to contact our 5 star customer service team who are always on hand to help. Visit our Help Centre or email us at info@naturewall.com.
If it is inspiration you are looking for, check out our blog post on Using SlatWall Waterproof in your home.
What do I need?
- SlatWall Waterproof panels
- Grab adhesive (our grab adhesive is fully versatile and can also be used as a sealant)
- Spirit level
- Scissors
- Fine-toothed wood saw (if cutting to your desired size is needed)
- End cap (optional)
- Top trim (optional)

Top Tip: If you are planning to cut your panels, simply measure where you want to cut and draw a line with a pencil and square edge. Ensure your fine-toothed saw has a sharp blade for a clean cut. You may require a little bit of sandpaper to reduce any rough edge. We do not recommend using a circular saw or jigsaw as this may splinter the material.
Install your SlatWall Waterproof Panels
Step 1 – Prepare your panels. Clear the area around you to avoid any damage whilst also allowing you the space to measure and cut the panels if necessary. Dust off the wall surface to ensure a smooth application.
Step 2 – Use your grab adhesive with a standard sealant or caulking gun for easy application. Insert the grab adhesive cartridge into the sealant gun by pressing the release trigger.
Pierce the tube with the metal rod ready for application. Cut the end of the cartridge at a 45 degree angle with scissors then simply pull the trigger to apply the adhesive to your panel.
We recommend a long wavy line down the back of your panel for the firmest application. One 290ml cartridge will cover approximately three 2400mm x 60mm panels.
Top Tip: If you wish to cover up the panel edge with an end cap, make sure to decide how this will fit on your wall before fixing your first panel. You can easily rotate your panel to match the end cap you have bought.
Step 3 – Position your first panel in your chosen place. Use a spirit level to ensure it is correctly aligned and then gently but firmly push the panel on to your wall to secure it in place.
Step 4 – Check you are happy with the position of the second panel by slotting it into the one you have already mounted. When you are ready, apply grab adhesive to the back of the second panel and slot together the tongue and groove edges. Ensure the edges are flush and again, press firmly to fix in place.
Step 5 – Repeat step 4 until you have the required amount of wall covered and you are happy with your design.
Step 6 – Add your accessories! Finish off the look with your tongue or groove end cap. Apply grab adhesive to the back and gently push into place from one end to the other. If you have created a half-wall design, use an individual slat on top to cover up any exposed edges.

Naturewall Tips
- Use sealant around any exposed edges to increase the waterproof properties and protect the wall behind.
- If you are wishing to place your panels on the ceiling, we recommend using screws to ensure the panels are fully secure.
- Allow the grab adhesive to properly dry and cure into place for around 24 hours, making sure there is no moisture around. Whilst the grab adhesive is drying, use your spirit level to ensure your panels and accessories are straight. You will be able to lightly move their positioning whilst the grab adhesive is drying.
Once the grab adhesive is dry, you can fully enjoy the look and feel of your new SlatWall Waterproof panels. Style them however you like and easily maintain them with normal soap, water and a microfiber cloth. If you have installed SlatWall Waterproof, we would love to see your finished design!
Tag us @naturewalluk on Instagram and use the hashtag #MyNaturewall.