Seen DIY panelling everywhere but don't know where to start? You've come to the right place because we've got you – and your wall – covered.
Whether you're renovating an entire property or looking to refresh an existing space without completely redecorating, panelling a wall is the way to go if you want a room full of character and interest. Plus, it's a great way to introduce a trend-driven aesthetic to your space while staying true to your personal style.
From start to finish, here's how to panel a wall in any room in your home.
How To Panel a Wall in Five Steps
Before and after reveals of DIY panelling are filling social feeds everywhere, with 'wall panelling' racking up 115.6 million views and counting on TikTok alone. And all it takes to get the look in your home is a few steps.
The good news is that panelling a wall is much easier than it might seem at first, so much so that you can completely transform a room in hours, not days, introducing depth and interest to your interior while complementing your design scheme.
Here are the five steps to follow to bring your DIY wall panelling to life.
1. Choose Your Panelling Style
Wall panels instantly add depth and interest to interiors, making them a great choice for making your house feel even more like a home. Pick a style you love that will work with your space and décor, and you'll have your dream interior in no time.
If you're searching for wall panelling ideas, some of the most popular styles include:
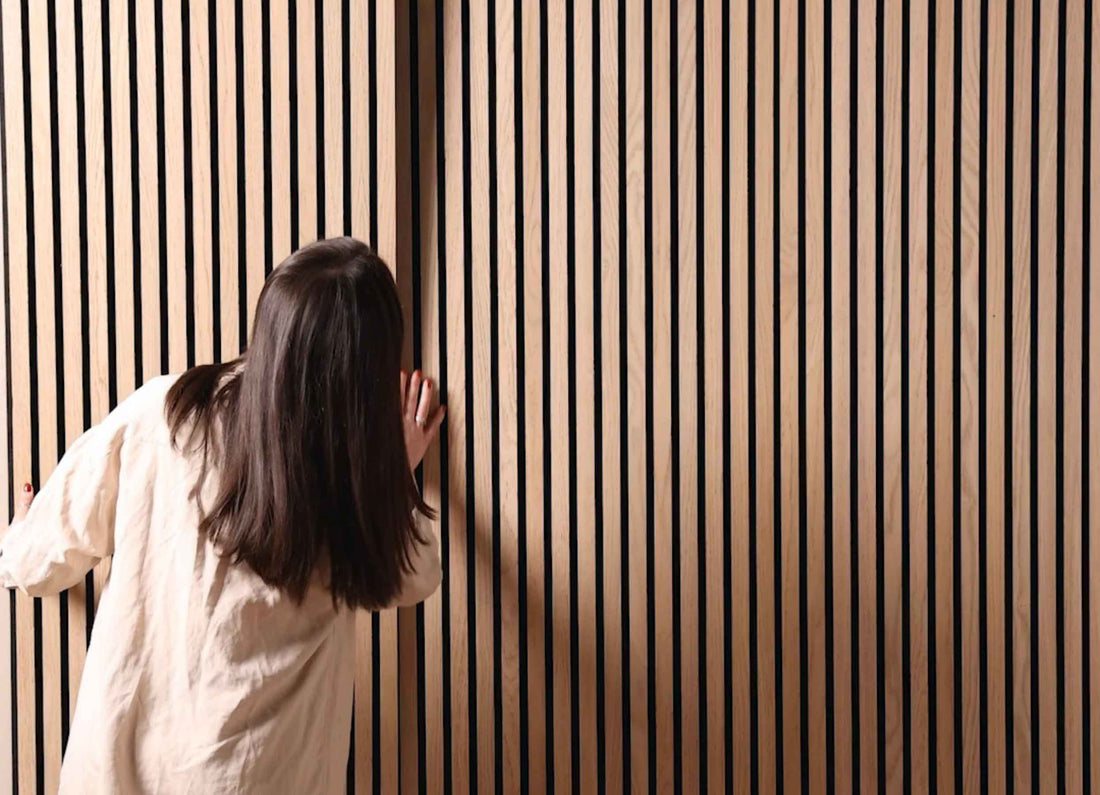
Slat panelling – a contemporary classic, this style features strips of wood applied to felt in a vertical arrangement with a gap between each strip. It adds texture and depth to walls, making it a versatile option for contemporary, Japandi and biophilic interiors. Plus, there are also waterproof varieties offering the wood-on-wood look.
Wainscoting – originally conceptualised to protect walls from furniture, wainscoting is one of the most traditional panelling varieties. It covers a wall's lower section, usually one-third or half, creating the illusion of a more expansive space with higher ceilings. Shiplap or tongue and groove panels are a timeless option for achieving the look and work particularly well in classical and farmhouse-chic interiors.
Fluted panelling – contemporary and design-driven, fluted panelling spans scalloped and reeded profiles. These styles feature curved profiles that cast interesting shadows, bringing depth, drama and a playful feel to interiors – ideal for making a statement in your space.
Shaker-style panels – another traditional option, Shaker-style panelling is ideal for adding character to contemporary interiors or maintaining a heritage feel in period properties. It's versatile and adaptable; you can create your own rectangular or square design in a layout of your choosing.
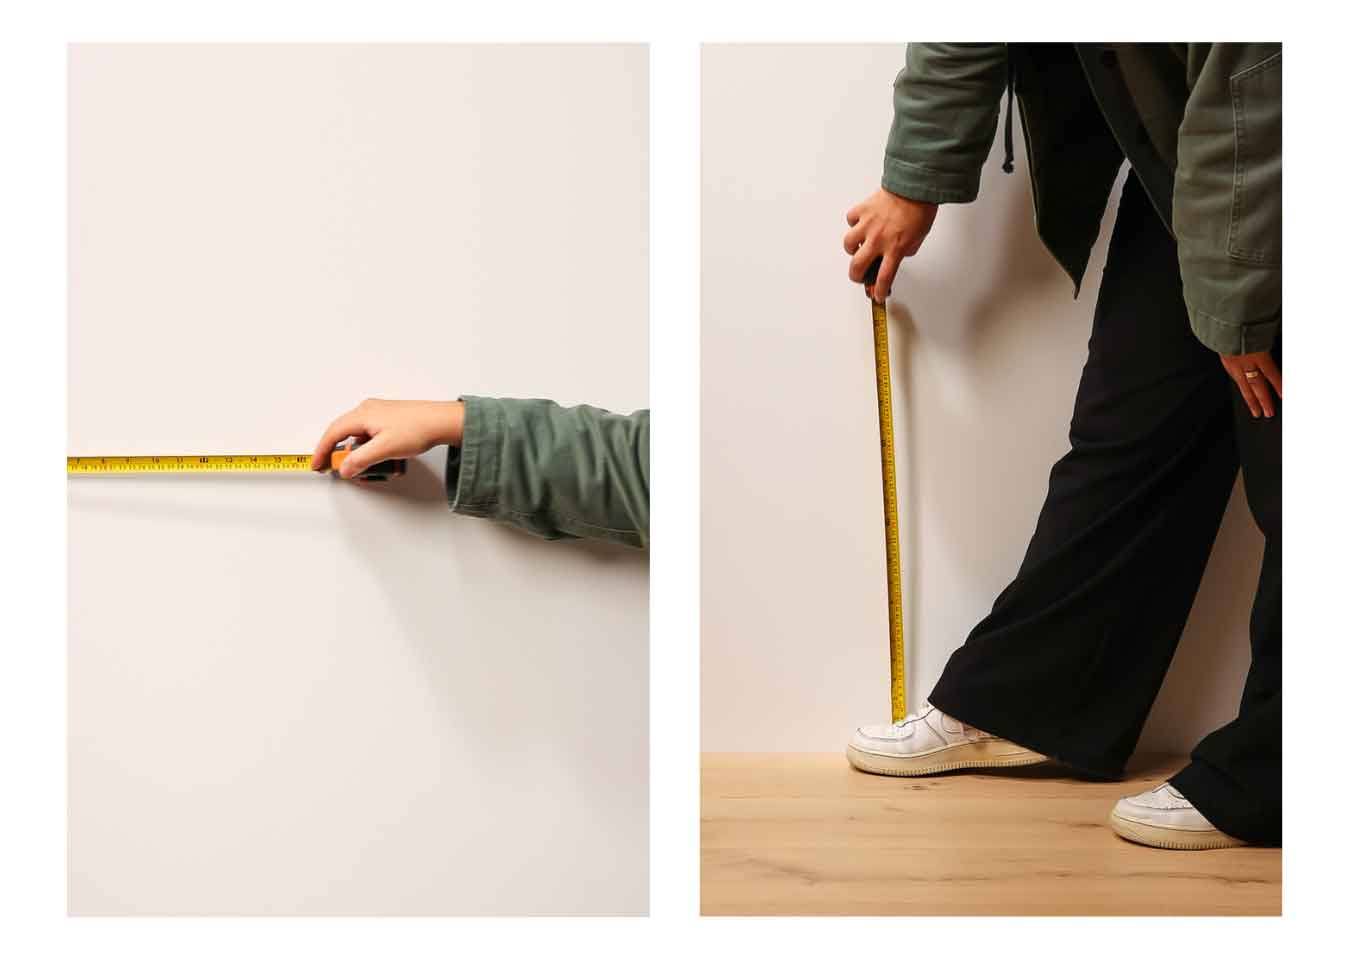
Once you've selected your style, measure the height and width of your wall to calculate how many panels you'll need to achieve your desired look. For instance, you may want to panel the full wall or a smaller section to zone an area of your room.
2. Get Your Tools Ready
Once you've chosen and ordered your panels, it's time to start prepping. Before you begin, there are a few things you'll need to make panelling your wall a straightforward process. Tools you'll need include:
- Measuring tape
- Pencil
- Masking tape
- Ruler
- Fine-toothed hand saw or power tools
- Sandpaper
- Wall plugs and screws or adhesive and sealant gun
Depending on the installation area and panelling style, such as paintable MDF wall panels, you may also need:
- Spirit level
- Sealant
- Pins
- Wood filler
- Caulk
- Paintbrush or roller
- Wood primer
- Paint
3. Prepare Your Wall
Starting with a smooth blank canvas provides the best conditions for achieving a flawless feature wall. Remove any fixtures, such as shelves, wall art or TVs, as these can be re-mounted after completing your DIY panelling. Fill in any large holes and smooth any rough patches that might still be visible after installation – this will ensure a pristine finish.
You'll also need to measure your wall to determine how to cut your panels to size to achieve your desired look. As walls – and panels – come in all shapes and sizes, this will vary from project to project, so it's best to measure as accurately as possible. As the saying goes, measure twice, cut once, so we recommend double-checking your measurements and noting them down to refer back to.
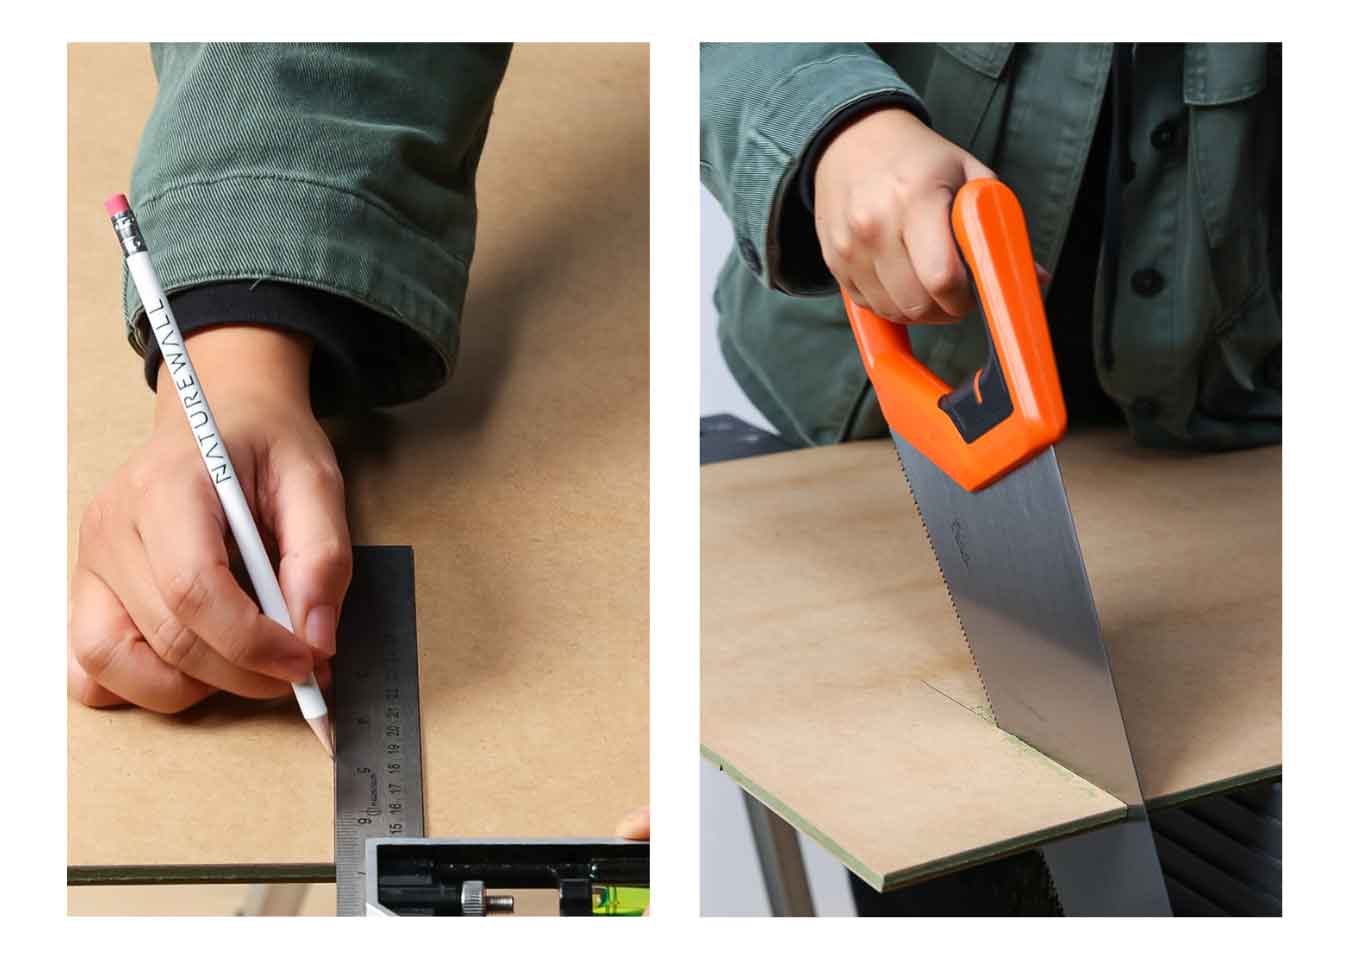
4. Cut Your Panels
Using the measurements of your wall, mark out where you'll need to cut your panels to fit. MDF wall panels can have cut lines marked directly on the surface. If you're cutting wood veneer panels, we recommend taping the wooden face with masking tape to protect the panel before marking the cut line with a pencil. Then, score the line with a sharp utility knife and use a new fine-toothed hand saw to aid a clean cut and minimise splintering.
If you need to cut out a hole in the panel for plug sockets or light switches, you can use a jigsaw or other relevant power tools. After cutting, lightly sand the edges with sandpaper for a smooth finish.
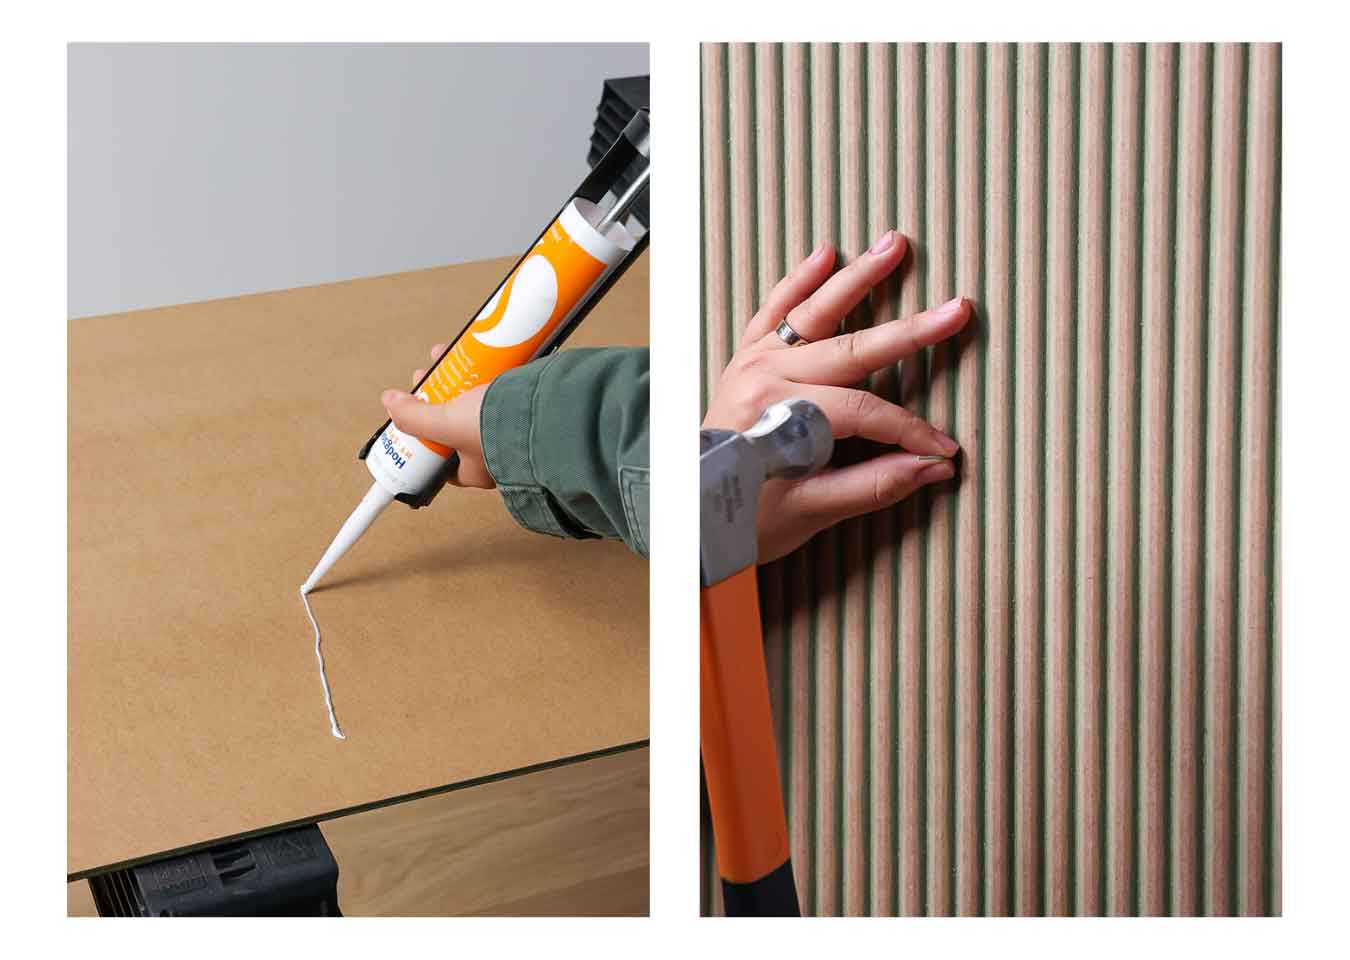
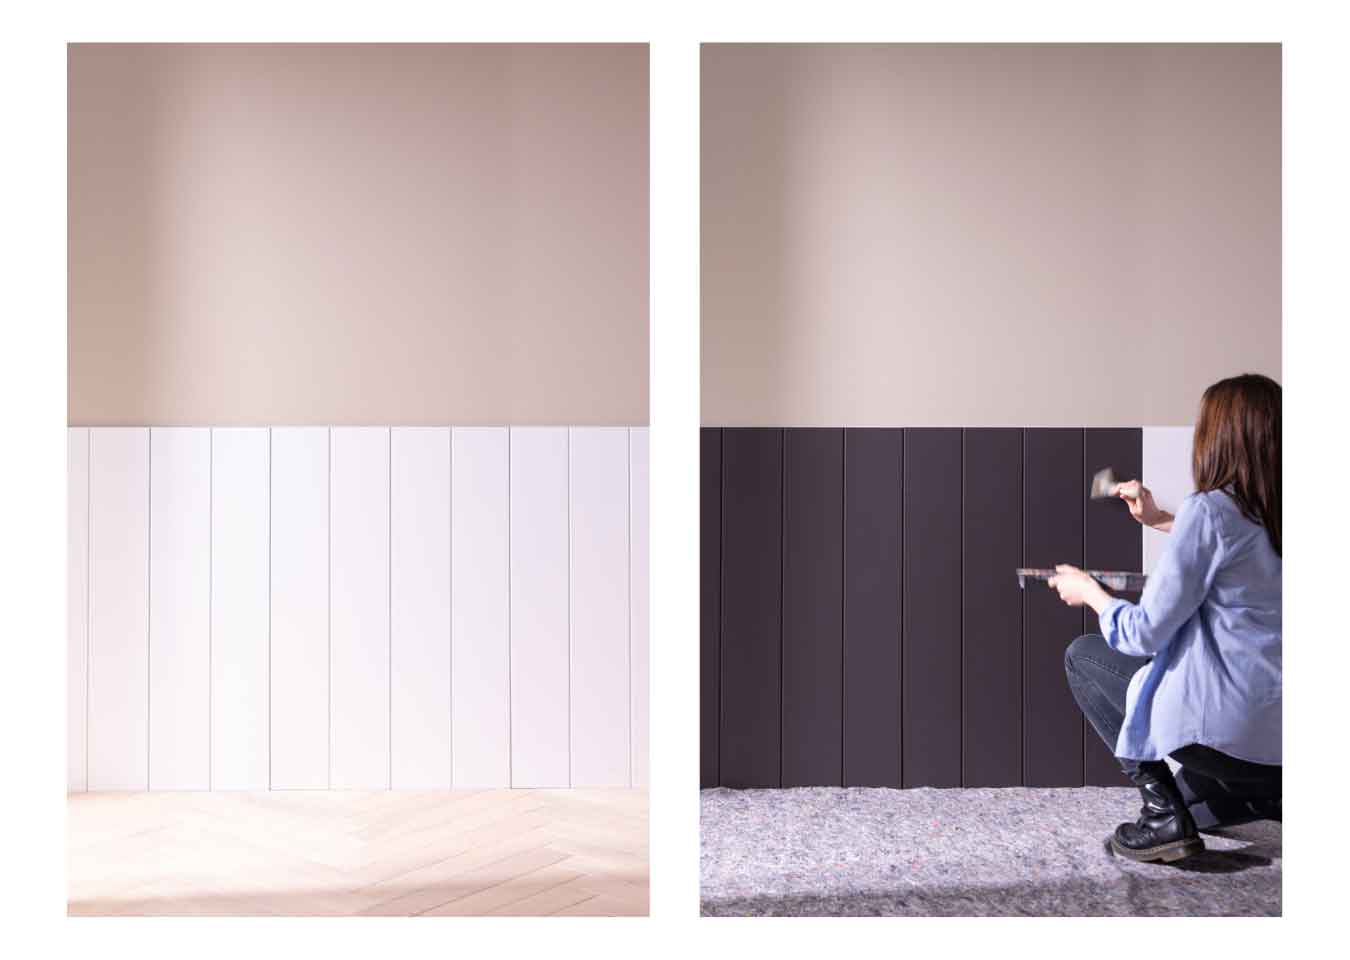
5. Install Your Panels
The installation process varies from style to style, so it's important to follow the correct guidance for the panelling you've chosen. All our wall panelling styles have their own dedicated fitting guides which break down the process into simple, easy-to-follow steps.
Fully finished styles, like wood veneer slat panelling, have a quick and simple installation process, which you can watch in the video below:
If you've installed paintable panels, you'll need to fill any gaps with caulk and cover the pins with wood filler, then remove any excess and leave them to dry. You'll also need to treat them with a water-based primer after applying them to the wall. We recommend at least two coats of primer, or until you reach your desired level of coverage, before painting to achieve the best finish.